Haus Architekturbüro
the what and the how
the what and the how
by sandra b.
by sandra b.
Installation Layer
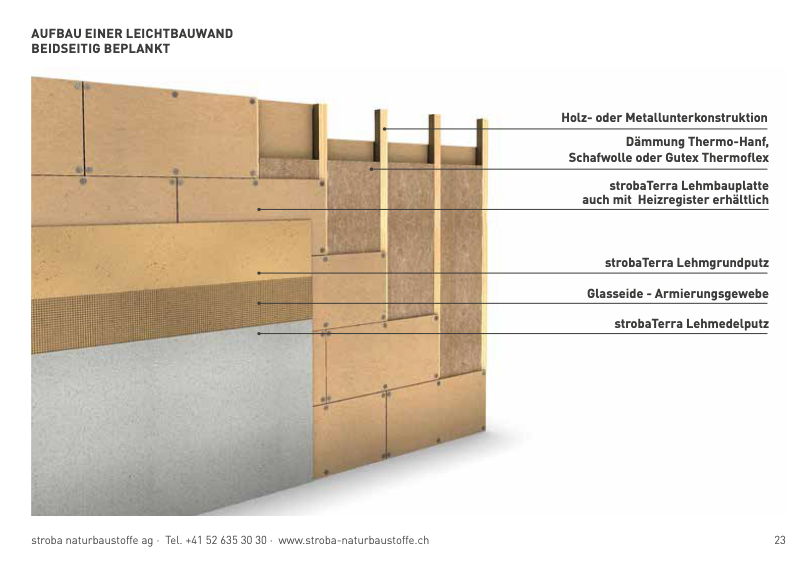
The inner walls are covered with clima clay panels and normal clay panels. The finishing or plastering was also made with clay. Before attaching the clay panels, we built an installation layer using wooding beams of 60mm x 80mm. Each beam is separated 62.5 cm from each other (from center to center). In between the beams we use 200mm sheep wool. Refer to the picture to the right, courtesy of Stroba Naturbaustoffe AG
Attachment of Clay Panels
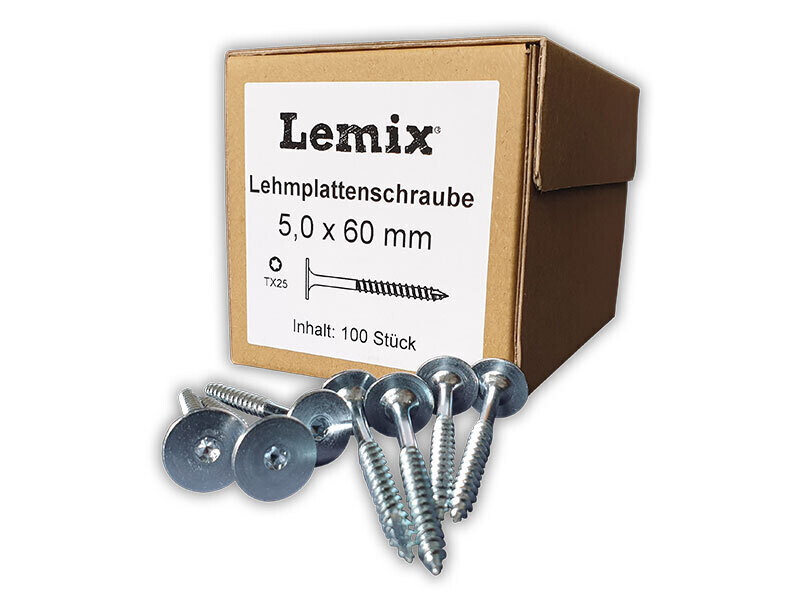
The clay panels were attached to the beams using two types of screws:
- Special screws for clay (Lemix)
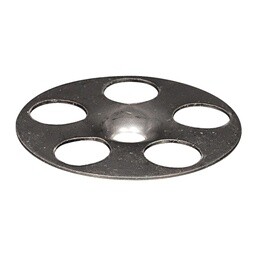
- Stainless steel screw with washers. (We used Fischer Halteteller HV)
Plastering of the Clay Panels
Clay panels were covered with a clay embedding mortar followed by the installation of a glass reinforcing mesh. The wall materials were provided by Lehmwerk AG together with some consulting services. All clay materials came in 25Kg bags. You simply add water and that is it.
First Layer
Learning how to do properly and fast the first layer with the embedding mortar is critical. From the consistency to the application. At the beginning I did it the hard way -- trial an error. Later on, talking to a professional, I was able to do the first layer of 2mm in one wall in about 1 h, instead of half day.
Subsequent Layers
After the first layer was dried, we proceeded to plaster the walls with white clay, except the one wall in the bathroom, that is red wine. The finishing plastering depends on how thick you want to have it. The consistency depends of what you are trying to achieve, In my case, I made added water until it became creamy but not so soft. I could advanced 1mm per day, max 2mm. Otherwise, I had cracks in the walls.
So, I initially did 10mm in each floor in the lower floor. With time I learned it was a waste of material. Nevertheless, is mass. So at the end I used
- First layer: 1 time: 2mm layer with the embedding mortar + glass reinforcing mesh.
- Subsequent Layers 2 to 3 times: 1mm layer with finishing clay plaster using a trowel
- Last Layer: I used a sponge instead of a trowel. In this case, I added water to the clay until it became quite liquid.I used circular movements to stretch the clay and make it uniform. It does gives a nice finishing.
Other pictures of other walls:
This website uses cookies. Here you can choose which cookies you want to allow and change your selection at any time. By clicking "Accept", you agree to the use of cookies.